Showing posts with label Technique. Show all posts

Sunday, January 16, 2011

Climbing Tools: The Prussik Knot

Climbing Tools: The Prussik Knot. This is a must know knot for any climber. Used for everything from self belay to crevasse rescue. Try this hitch out. It is real easy but believe me you can be really hooped if you don't know it. On the other hand this will get you out of a bind when nothing else will. Common knot for mountaineers who travel light in the big hills. Used to ascend a rope or self rescue out of a crevasse.


Climbing Tools: The Prussik Knot

Climbing Tools
Video download Climbing Tools: The Prussik Knot

Download
NEXT ->>...

Ascending - Doubled Rope Technique [Video]

NEXT ->>...

Thursday, January 13, 2011

Teknik Mendayung

Teknik Mendayung. Pada postingan saya kali ini saya sedikit ingin membahas bagaimana cara medayung, terutama untuk kamu-kamu yang pengin tahu gimana sih teknik mendayung dengan benar. Teknik mendayung pada umumnya dilakukan sama untuk setiap perahu. Mendayung dilakukan dengan tujuan menggerakkan perahu untuk berpindah dari satu posisi ke posisi lain. Tetapi pada kenyataannya, mendayung adalah menggerakkan sekelompok air dan memindahkannya dari satu posisi ke posisi lainnya. Dengan posisi rafter di atas perahu dan perahu berada di atas air, maka mendayung seolah-olah menggerakkan perahu.

Teknik Mendayung
Beberapa teknik mendayung yang harus dikuasai oleh rafter pemula, diantaranya adalah:
  1. Dayung maju (forward paddle/forward stroke) adalah gerakan mengayuhkan dayung dari depan ditarik hingga ke belakang, dengan alur dayungan lurus di pinggir lambung perahu. Gerakan ini berdasarkan komando, dengan tujuan supaya perahu melaju ke arah depan.
  2. Dayung mundur (back paddle/back stroke) adalah gerakan mengayuhkan dayung dari belakang di tarik hingga ke depan, dengan alur dayungan lurus di pinggir lambung perahu. Gerakan ini berdasarkan komando, dengan tujuan supaya perahu melaju ke arah belakang.
  3. Dayung kiri mundur (left back paddle/left back stroke) adalah gerakan mengayuhkan dayung yang terbagi ke dalam dua kelompok : kelompok pertama yang duduk di sebelah kiri, melakukan kayuhan dayung mundur, sedangkan kelompok kedua yang duduk di sebelah kanan, melakukan kayuhan dayung maju. Gerakan ini dimaksudkan agar perahu berbelok ke kiri.
  4. Dayung kanan mundur (right back paddle/right back stroke) adalah gerakan mengayuhkan dayung yang terbagi ke dalam dua kelompok : kelompok pertama yang duduk di sebelah kanan, melakukan kayuhan dayung mundur, sedangkan kelompok kedua yang duduk di sebelah kiri, melakukan kayuhan dayung maju. Gerakan ini dimaksudkan agar perahu berbelok ke kanan.
  5. Dayung geser kiri (left draw) adalah gerakan mengayuhkan dayung yang terbagi ke dalam dua kelompok : kelompok pertama yang duduk di sebelah kiri, melakukan kayuhan dayung dari arah luar ke arah dalam pinggir lambung perahu 90 derajat, sedangkan kelompok kedua yang duduk di sebelah kanan, melakukan kayuhan dayung mencungkil dari pinggir lambung, ke luar menjauh dari lambung arah 90 derajat dari lambung. Gerakan ini dimaksudkan agar perahu bergeser ke kiri.
  6. Dayung geser kanan (right draw) adalah gerakan mengayuhkan dayung yang terbagi ke dalam dua kelompok : Kelompok pertama yang duduk di sebelah kiri, melakukan kayuhan dayung dari arah luar ke arah dalam pinggir lambung perahu searah 90 derajat, sedangkan kelompok kedua yang duduk di sebelah kanan, melakukan kayuhan dayung mencungkil dari pinggir dalam lambung, ke luar menjauh dari lambung arah 90 derajat. Gerakan ini dimaksudkan agar perahu berbelok ke kanan.
  7. Berhenti (stop), maksudnya adalah tidak ada gerakan. Hal ini penting diperhatikan karena tidak selamanya crew harus mendayung. Ketika dirasakan laju perahu terlalu cepat, maka hal ini harus dilakukan melalui keomando stop dan berhenti. Pada saat ada hal penting lain yang juga harus diperhatikan, yaitu ketika crew memegang dayung posisi stop, dayung dipegang dan diletakkan di atas paha, menyerong ke belakang membentuk arah 45 derajat. Hal ini dimaksudkan untuk menghidari kecelakaan di atas perahu, yaitu jika sirip dayung yang berada diluar menabrak batu atau benda keras lainnya, maka pegangan yang berada di bagian dalam perahu, tidak akan mengenai crew yag lainnnya yang berada di sebelah si pemegang dayung.
Semoga sedikit paparan tentang teknik mendayung ini bermanfaat untuk para sobat petualang yang pengin belajar atau sekedar mengetahui teknik mendayung dengan benar.
NEXT ->>...

Monday, January 10, 2011

Bouldering Techniques

Bouldering Techniques. So you are planning upon practicing bouldering - a good choice! But there is a ton of ground work that has to be done as bouldering is not just about climbing and descending, it is a much more complicated part of rock climbing. The first part of the ground work is toning your your body and muscles. Chief requirements of bouldering are a toned body, flexibility, great muscle power, light weight and a good respiration. All these factors contribute to effective and safe climbing. In order to achieve such a level of physical fitness, you will need to do lots of exercise, such as frequent swimming, running, swift walking and push us and pull ups. In addition, gym work outs and Yoga will add to the benefit, as they will enhance respiration, flexibility and muscle toning. Once you have completed this ground work, to your satisfaction you may proceed to the actual climbing. Read on extreme sports
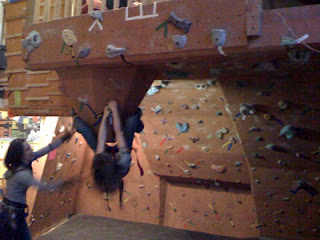
Bouldering Techniques
Bouldering Techniques 1: Warm Up and Get Ready
The first step before you undertake any bouldering activity is to warm up your body and have an equipment check. Warming up your body and working up a mild sweat is absolutely essential due to the fact that a warmed up body has a better response and reflex, not to mention a greater ability to exert power and strength. It would also prevent your muscles from cramping up and in addition to that oxygen and blood will reach to every possible corner of your body. Once you are done proceed to the rock face and make some basic holds, with both your hands and feet. Once you feel that you are ready, have a look at the rope, waist harness, carabiner and descender. Now you are ready to surmount the rock.

Bouldering Techniques 2: Read the Route and Feel the Rock
The next important technique is to read the route or rather plan the route on the rock face that you wish to take. You will need to visualize and analyze the route that you want to take up. Hence, just plan out your foot holds and hand holds, if possible along fissure or cracks in the rock face. It is also advisable to visualize each hold and the route. It must be taken into consideration that you might need to alter the plan, during the actual climb. Hence, it is wise to spot and memorize alternative holds. A common mistake that many people make is to ignore the descend. It is also important that you visualize the descend, since not all ascend holds can be used for a safe descend.

Bouldering Techniques 3: Holds and Grip
Many of us enthusiastically take a tight grip over the hold that we have found. However, it is better to have a relaxed and firm grip. A relaxed and firm grip is especially essential for foot holds. You may achieve such a grip by equally distributing your weigh and leaning towards the rock face but resist the urge of hugging it. Many amateurs often wonder that how can this possibly be advantageous. Well, when you lean in towards the rock, the action of gravity that acts on your body, decreases and believe it or not, it decreases our weight and enhances your balance. Another tip that is often offered, is that leaning too much is not very healthy but leaning in a parallel manner, further betters the balance. Thus, making a relaxed and firm grip is better than making a tight grip.

Bouldering Techniques 4: Static Climbing
Among the many bouldering tips the one that is very much ignored is static climbing. It basically means that bouldering is a method of climbing where shifting of weight eventually and evenly is necessary. Practically speaking, all you need to do is make two holds with a similar axis on the rock such as left hand hold and right leg hold or vice versa. You may also balance out only on your two feet, but I would advise you against balancing on only one hand or foot or only on two hands.

Source : http://www.buzzle.com/articles/bouldering-techniques.html
NEXT ->>...
Monday, May 4, 2009

Techniques Of Mountain Climbing

Techniques Of Mountain ClimbingTechniques Of Mountain Climbing. If you're looking for a fun, enjoyable and exciting way to use up your free time, you can try mountain climbing. Studies show though that avid mountaineers are those who have no family, friends or loved ones. Why? Because this is a risky sport to engage in.

If you've fully decided to try mountain climbing, here are some tips that can help you reach the peak.

  1. Choose which mountain to climb. Decide on your route. Get the best one that is most suitable for you and your group. Remember to choose a mountain that is appropriate for the technique you will apply. For example, if you are using rock climbing techniques then choose a mountain that has a low-rising footpath. In that way, you won't be scraping your knees along the edges as much. If you also choose to hike through the summit but one that has overhanging ice, you won't be able to reach the top.
  2. You have to be aware that with each step you take, the terrain gets steeper. Therefore, there is less oxygen and the climate gets harsher. Each step you take is more difficult.
  3. Equip yourself with the proper gear. You can get these at any outdoor sports store. There are also some in junkyards or yard sales. But if you are investing in this activity, then you might as well get first-hand gear, right?

Your gear should include the following: - backpack - pair of boots - coat - canteen to be filled with water - food that would last you during your entire excavation - first aid kit - flashlight - sunscreen - sunglasses - map - friend or companion. Never climb alone.
You can also bring a rifle (to protect yourself from wild beasts out there) and enough ammunition. If you're ice climbing, bring an ice axe and warm clothing. Don't forget the rope because this will be very useful.

When you're actually climbing the mountain, you have to get to it first. Upon arriving at the base of the mountain, you have to know what you're doing before you start out. Always be safe with each step you take. Keep your ice axe within reach just in case the situation calls for it. Don't get hypothermia. Don't get lost. Don't panic. These are a couple of key rules. Most importantly, have fun.

Website : www.goarticles.com
NEXT ->>...