Showing posts with label Tips and Tricks. Show all posts

Thursday, January 13, 2011

Teknik Mendayung

Teknik Mendayung. Pada postingan saya kali ini saya sedikit ingin membahas bagaimana cara medayung, terutama untuk kamu-kamu yang pengin tahu gimana sih teknik mendayung dengan benar. Teknik mendayung pada umumnya dilakukan sama untuk setiap perahu. Mendayung dilakukan dengan tujuan menggerakkan perahu untuk berpindah dari satu posisi ke posisi lain. Tetapi pada kenyataannya, mendayung adalah menggerakkan sekelompok air dan memindahkannya dari satu posisi ke posisi lainnya. Dengan posisi rafter di atas perahu dan perahu berada di atas air, maka mendayung seolah-olah menggerakkan perahu.
Teknik Mendayung
Beberapa teknik mendayung yang harus dikuasai oleh rafter pemula, diantaranya adalah:
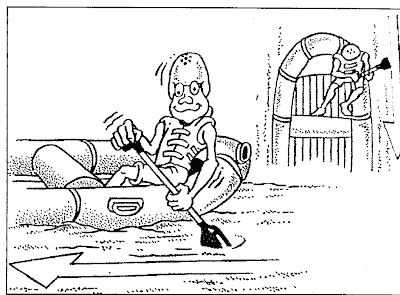
  1. Dayung maju (forward paddle/forward stroke) adalah gerakan mengayuhkan dayung dari depan ditarik hingga ke belakang, dengan alur dayungan lurus di pinggir lambung perahu. Gerakan ini berdasarkan komando, dengan tujuan supaya perahu melaju ke arah depan.
  2. Dayung mundur (back paddle/back stroke) adalah gerakan mengayuhkan dayung dari belakang di tarik hingga ke depan, dengan alur dayungan lurus di pinggir lambung perahu. Gerakan ini berdasarkan komando, dengan tujuan supaya perahu melaju ke arah belakang.
  3. Dayung kiri mundur (left back paddle/left back stroke) adalah gerakan mengayuhkan dayung yang terbagi ke dalam dua kelompok : kelompok pertama yang duduk di sebelah kiri, melakukan kayuhan dayung mundur, sedangkan kelompok kedua yang duduk di sebelah kanan, melakukan kayuhan dayung maju. Gerakan ini dimaksudkan agar perahu berbelok ke kiri.
  4. Dayung kanan mundur (right back paddle/right back stroke) adalah gerakan mengayuhkan dayung yang terbagi ke dalam dua kelompok : kelompok pertama yang duduk di sebelah kanan, melakukan kayuhan dayung mundur, sedangkan kelompok kedua yang duduk di sebelah kiri, melakukan kayuhan dayung maju. Gerakan ini dimaksudkan agar perahu berbelok ke kanan.
  5. Dayung geser kiri (left draw) adalah gerakan mengayuhkan dayung yang terbagi ke dalam dua kelompok : kelompok pertama yang duduk di sebelah kiri, melakukan kayuhan dayung dari arah luar ke arah dalam pinggir lambung perahu 90 derajat, sedangkan kelompok kedua yang duduk di sebelah kanan, melakukan kayuhan dayung mencungkil dari pinggir lambung, ke luar menjauh dari lambung arah 90 derajat dari lambung. Gerakan ini dimaksudkan agar perahu bergeser ke kiri.
  6. Dayung geser kanan (right draw) adalah gerakan mengayuhkan dayung yang terbagi ke dalam dua kelompok : Kelompok pertama yang duduk di sebelah kiri, melakukan kayuhan dayung dari arah luar ke arah dalam pinggir lambung perahu searah 90 derajat, sedangkan kelompok kedua yang duduk di sebelah kanan, melakukan kayuhan dayung mencungkil dari pinggir dalam lambung, ke luar menjauh dari lambung arah 90 derajat. Gerakan ini dimaksudkan agar perahu berbelok ke kanan.
  7. Berhenti (stop), maksudnya adalah tidak ada gerakan. Hal ini penting diperhatikan karena tidak selamanya crew harus mendayung. Ketika dirasakan laju perahu terlalu cepat, maka hal ini harus dilakukan melalui keomando stop dan berhenti. Pada saat ada hal penting lain yang juga harus diperhatikan, yaitu ketika crew memegang dayung posisi stop, dayung dipegang dan diletakkan di atas paha, menyerong ke belakang membentuk arah 45 derajat. Hal ini dimaksudkan untuk menghidari kecelakaan di atas perahu, yaitu jika sirip dayung yang berada diluar menabrak batu atau benda keras lainnya, maka pegangan yang berada di bagian dalam perahu, tidak akan mengenai crew yag lainnnya yang berada di sebelah si pemegang dayung.
Semoga sedikit paparan tentang teknik mendayung ini bermanfaat untuk para sobat petualang yang pengin belajar atau sekedar mengetahui teknik mendayung dengan benar.
NEXT ->>...

Thursday, June 11, 2009

Tentang Waterproof

WaterproofKata waterproof selalu dihubungkan dengan bagian luar atau kulit luar, bisa berupa pembungkus pakaian dan banyak lagi. Secara fungsional, waterproof harus menjadi pelindung atau penahan air agar benda yang dilindunginya tidak basah.

Bagi para pegiat di alam terbuka, pemakaian bahan-bahan yang waterproof merupakan kebutuhan pokok, mulai dari ransel, tenda, sampai jas hujan dan sepatu. Bisa dibayangkan apabila barang-barang tadi tidak memakai bahan-bahan yang waterproof, mungkin kita hanya mampu berjalan satu atau dua hari saja.

Dalam tulisan ini akan dibahas tentang ragam pelapis (coating) yang mampu membuat kain bisa jadi waterproof dan lebih khusus lagi pembahasan mengenai jaket yang waterproof. Pemakaian jaket selain membuat tubuh jadi hangat, juga bisa menahan air (waterproof) pada saat hujan dan mampu melindungi tubuh dari terpaan angin (windproof), sehingga kita mampu melakukan kegiatan lebih lama lagi. Jaket yang waterproof pasti windproof, tapi yang windproof belum tentu waterproof. Sayangnya, jaket yang windproof atau waterproof saja belumlah cukup, karena panas tubuh yang dikeluarkan oleh pemakai akan menjalar ke seluruh permukaan tubuh yang tertutup jaket, dampaknya terjadilah penguapan (condensation). Jika penguapan ini berlangsung lama, maka pakain kita akan basah dan tidak nyaman.

Untuk menanggulangi terjadinya penguapan, para produsen mulai memikirkan cara lain, yaitu dilapisi oleh cairan yg bisa membuat pori-pori pada saat terjadi penguapan, atau istilahnya kain itu bisa bernafas (breathable). Pori-pori tersebut akan membuka pada saat pemakai jaket sudah merasa ada peningkatan suhu jika dibandingkan pada saat diam. Jadi uap panas tadi akan keluar melalui pori-pori tersebut, sehingga proses penguapan tidak sempat terjadi. Keistimewaan cairan yang akan mengeringkan dan menyerupai membran ini adalah butiran air atau terpaan angin tidak bisa masuk. Jadi, itulah jaket yang baik bagi pegiat di alam terbuka dan bisa juga dipakai oleh pengendara sepeda motor, yaitu jaket yang waterproof-windproof-breathable.

Berikut akan dijelaskan beberapa jenis pelapis (coating) yang mampu berfungsi sebagai waterproof-windproof-breathable.

NEOPRENE COATED
Cairan karet yang akan melapisi bagian dalam kain ini mempunyai daya kedap air yang sangat tinggi dan kuat. Pelapis ini lebih dikenal dengan nama “Rubber Coating”, sifatnya sangat waterproof dan bahan karet ini menjadikan kain bertambah berat serta mempercepat tejadinya kondensasi, sehingga tidak cocok untuk jaket, baik untuk dijadikan ponco atau tarp/ply sheet.

POLYURETHANE COATED
Biasa dikenal dengan P.U Coating. Jika salah satu permukaan kain dilapisi cairan kimia polyurethane, maka akan menjadikan kain ini waterproof dan windproof, tapi tidak breathable. Dengan demikian kondensasi masih tetap akan terjadi. Berbeda dengan Rubber Coating, kain yag diberi P.U Coating lebih ringan. Jika dijadikan rain coat, hanya cocok untuk menghadapi cuaca hujan rintik-rintik di musim panas.

E.X.E.A.T
Coating ini terbuat dari bahan cairan kimia Hydrophilic. Peleburan yang berulang-ulang dengan cairan ini akan menghasilkan kain yang waterproof dan breathable.

HYDRO-DRY
Coating yang menggunakan cairan kimia ini hampir sama dengan EXEAT, yaitu menjadikan kain waterproof dan breathable. Tetapi berdasarkan berat kainnya, HYDRO-DRY membaginya dalam 3 kategori pemakaian, yaitu :
Terrain, biasa digunakan pada bahan Nylon Polyamide, baik yang Ripstop maupun anyaman biasa.

Endura, coating ini biasa dipakai pada bahan yang mengandung 100% Tactel Microfibre yang sangat kuat dan tahan sobek, tanpa batas tertentu.

Momentum, biasa digunakan pada bahan Polyester. Coating ini menawarkan keunggulan manfaat yang luar biasa, seperti praktis dalam pengepakan, tidak berisik dan mempunyai kekuatan yang sangat baik.

LOWEALPINE TRIPLE POINT CERAMIC
Suatu pengembangan yang luar biasa, Polyurethane Coating dicampur dengan jutaan partikel keramik, sehingga dapat menjadi benteng penghalang bagi pori-pori kain. Komposisi ini mampu menghasilkan kain yang bisa mengeluarkan uap panas dari tubuh si pemakai, tapi air dari luar tidak bisa masuk, terlebih bagian luarnya dilabur lagi dengan Durable Water Repellecy (DWR). Berbeda dengan membran lainnya yang hanya dilabur pada permukaan kainnya saja, Triple Point Ceramic sifatnya mengikat pada setiap anyaman benang secara langsung, sehingga lapisan tersebut tidak cepat rusak atau luntur, baik pada bagian siku atau bahu.

GORE-TEX
Setelah berpengalaman selama 30 tahun lebih dalam menangani masalah kain waterproof dan breathable, Gore-tex tetap menjadi nomor satu di dunia. Lapisan film yang ditebar pada salah satu permukaan kain ini terbuat dari bahan Poly Tetra Fluro Ethylene (PTFE). Kombinasi kimia yang rumit ini akan mengembang setelah terkena udara, sehingga akan menghasilkan Microporous Membrane dengan sembilan juta pori-pori pada setiap inci perseginya. Setiap pori-pori bersifat 700 kali lebih besar dari molekul uap air, tetapi 20.000 kali lebih kecil dari butiran tetesan air (hujan, dan sebagainya).
Bagian kedua dari Gore-tex ini adalah polyakylene oxide, sebuah bahan yang bersifat oleophobic (oil hating) dan tahan terhadap pengaruh kontaminasi. Bahan ini bisa menjadikan kain yang Hydrophilic / Hydrophobic bisa menahan dan melepas air, contohnya : lapisan Hydrophilic pada bagian dalam mengeluarkan air ke bagian luar bahan, kemudian menangkisnya melalui lapisan Hydrophobic. Sedangkan lapisan Hydrophobic ini membantu proses anti air (waterproof), yang akan menjadikan air bergumpal seperti manik-manik yang menebar pada permukaan kain, sehingga mudah mengalir tanpa merembes ke kain utama. Sistem ini yang ikut membantu terjadinya proses pernafasan (Breathability). Ada kelamahan dari bahan Gore-tex ini, yaitu umurnya pendek, sehingga perlu dilapisi berulang-ulang, kalau tidak, sudah pasti akan mengurangi tingkat breathability-nya.

Lapisan PTFE pada Gore-tex sangat tipis dan lembut, sehingga dibutuhkan lapisan pelindung (layer) supaya tidak mudah rusak dan menambah kuat terhadap friksi / gesekan dari kulit yang ditimbulkan oleh si pemakai. Berdasarkan hal tersebut, maka dalam pemakaiannya Gore-tex membaginya dalam kategori :

3-Ply Garment
Komposisi ini menghasilkan kain menjadi tiga lapis, yaitu kain dasar dilapis dengan PTFE, kemudian dilapis lagi dengan Nylon yang lembut.

2-Ply Garment
Proses pembuatan lapisan pertama dan kedua (kain dasar+PTFE), sama seperti 3-Ply Garment, tapi pada kain jenis ini tidak diberi lagi Nylon yang lembut sebagai pelindung yang melekat pada membran PTFE, melainkan terpisah, bisa memaki Nylon Mesh atau bahan tipis (puring). 2-Ply Garment biasanya dipakai pada jaket-jaket untuk kegiatan yang bersita bergerak cepat, seperti ski es atau lari lintas bukit, karena uap panas yang dikeluarkan oleh tubuh akan cepat keluar melalui pori-pori membran dari kain dasar. Sedangkan 3-Ply Garment lebih cocok untuk kegiatan pendakian gunung di atas 8.000 meter atau untuk penjelajahan di padang es Antartika.

Setelah kita mendapatkan kain yang waterproof, windproof dan breathable, ternyata kita belum aman dari rembesan air hujan. Setiap tindik jahitan akan mengakibatkan kebocoran (konalisasi), cara penanggulangannya yaitu dengan ditutup pelapis dari bahan plastik (seam sealing), sehingga air apapun tidak akan merembes lagi melalui jahitan tersebut.

Technical Rainsuit
Technical Rainsuit yang layak digunakan untuk daerah tropis. Dengan menggunakan bahan Nylon Ripstop yang bagian dalamnya dilabur dengan Microporous Membrane, menjadikan bahan ini breathable. Sedangkan bagian luarnya diberi Coating Water Repellence, menjadikan kainnya kedap air. Untuk setiap jahitannya selalu ditutup dengan teknologi seam sealing, guna mengantisipasi kebocoran dari setiap jahitannya.
NEXT ->>...

Saturday, May 9, 2009

Taking Mountain Climbing Rescue Course

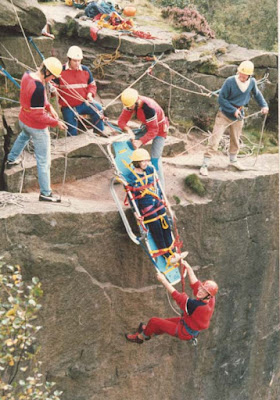
Taking Mountain Climbing Rescue Course. The following are some of the rescue mountain climbing courses offered by some of the premier emergency and rescue response institutions. They have also taught all and every manner of emergency outdoor response.

Rescue rock essentials

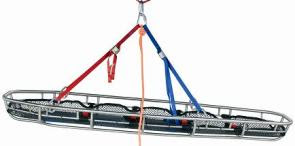
Mountain Climbing Rescue CourseThis is a rescue type course that offers an intro to rescuing the self through a series of rope systems especially for mountain climbing. Also offered is a three day course version. The focus of the rescue rock essentials is safety, lowering, raising as well as self rescue. Included in the course are safety rappelling, improvised stretchers as well as carries. Believe it or not, this course also comes with first aid info, it is a necessity that all mountain climbers have such basic first aid training.

Rescue high angle dynamics

This is a course that runs from 5 to 7 days and is specifically designed for the participants to be introduced to a wide range of basic skills rescue as well as transport for those injured in a difficult terrain or in high angled positions.

Much of the course involve procedures of extrication as well as rescue on vertical and steep rocks. Participants of this course are also introduced to rappelling, belaying, equipment and knots, carries, anchors, system raising, use of litter, system lowering as well as a wide range of technical subjects.

The fact of the matter is that there are two rescue stream courses offered, one is for leaders of wilderness as well as for professionals. Wild and hard rescue

This rescue is taken best by those cavers, climbers, river travelers whose role in a group is that of a leader. Any and all participants of this course need to have knowledge of basic knots and ropework.

The first level involve rescuing self as well as skills in handling a rope. Included in the course is rescue rappelling and a system of counterbalance. Ascenders and prusiks as well as their proper use is also included.

Mountain Climbing Rescue Course
Rescue high angle professional dynamics

This is a course that stretches to five days and is designed to help participants have a wide range of basic rescue transport and skills for those injured in a high angle or difficult situation.

Participants who have taken part in such courses have advised that their confidence and courage in being able to deal with challenging mountain climbing situations have increased. All in all, learning mountain climbing rescue courses is essential for those who do mountain climbing regularly. Cliché as it may sound, the life you save could just as well be yours.

Mountain Climbing Rescue CourseDesigned for high angle

Source : www.goarticles.com
NEXT ->>...

Friday, May 8, 2009

The Different Conditions Of Mountain Climbing

Mountain climbing is ascending elevated points of mountains or peaks. This is a challenge to those who dare themselves to heights. It is often done in groups because it not only requires individual skill but teamwork as a whole.

Mountain climbing is divided into three categories. The first one is hiking or trail climbing. This is the least difficult. Participants hike up trails to reach the top of a mountain. Trails are usually not that steep and the mountains are smaller compared to the rest.

The second category is rock climbing. Here, participants climb up larger mountains, therefore the slopes are steeper. They have to go up using their hands and their feet plus a special equipment including rubber boots with thick soles. They have to bring with them steel pikes called pitons and rope to assist them.

Ice climbing is the most difficult among the three. Here, participants climb extremely high mountains with peaks above the timber line. The equipment usually used in ice climbing are ice axes and boot spikes that are attachable (crampons).

Famous climbs over the years are those of ice and rock climbing. However, the first significant mountain climbing turning points were those at Mont Blanc. One was by Michel G. Paccard and Jacques Balmat in 1786 and Horace B. de Saussure in 1787.

Then there is the climb of the Ortles in 1804, Jungfrau in 1811, Finsteraarhorn in 1812 and Mont Pelvou in 1848.

Mountain climbing enthusiasts are all required to be aware of the various trail conditions that could take place on the day of their climb. Hikers must know that the weather is unpredictable and whatever changes might occur, this can affect their expedition.

Here are a couple of trail conditions and what a mountain climber must do once he encounters them:

  1. Open There are no restrictions. Any mountain climber can hike through the trail.
  2. Partial Some of the roads leading to a couple of paths are off limits for mountain climbers. Only a portion of the trail is accessible. This could be due to the snow, wildlife closure and trail damage right ahead.
  3. Closed Mountain climbers can no longer hike when this sign is up. A closed trail can be due to forest closure, road damage and wildlife closure.
  4. Snow The trail is still open but this sign warns the mountain climbers that there is snow in the area.
  5. Inaccessible The trail can't be accessed because of closure and road damage on the trails and the roads that are leading to it.
NEXT ->>...

Monday, May 4, 2009

Techniques Of Mountain Climbing

Techniques Of Mountain ClimbingTechniques Of Mountain Climbing. If you're looking for a fun, enjoyable and exciting way to use up your free time, you can try mountain climbing. Studies show though that avid mountaineers are those who have no family, friends or loved ones. Why? Because this is a risky sport to engage in.

If you've fully decided to try mountain climbing, here are some tips that can help you reach the peak.

  1. Choose which mountain to climb. Decide on your route. Get the best one that is most suitable for you and your group. Remember to choose a mountain that is appropriate for the technique you will apply. For example, if you are using rock climbing techniques then choose a mountain that has a low-rising footpath. In that way, you won't be scraping your knees along the edges as much. If you also choose to hike through the summit but one that has overhanging ice, you won't be able to reach the top.
  2. You have to be aware that with each step you take, the terrain gets steeper. Therefore, there is less oxygen and the climate gets harsher. Each step you take is more difficult.
  3. Equip yourself with the proper gear. You can get these at any outdoor sports store. There are also some in junkyards or yard sales. But if you are investing in this activity, then you might as well get first-hand gear, right?

Your gear should include the following: - backpack - pair of boots - coat - canteen to be filled with water - food that would last you during your entire excavation - first aid kit - flashlight - sunscreen - sunglasses - map - friend or companion. Never climb alone.
You can also bring a rifle (to protect yourself from wild beasts out there) and enough ammunition. If you're ice climbing, bring an ice axe and warm clothing. Don't forget the rope because this will be very useful.

When you're actually climbing the mountain, you have to get to it first. Upon arriving at the base of the mountain, you have to know what you're doing before you start out. Always be safe with each step you take. Keep your ice axe within reach just in case the situation calls for it. Don't get hypothermia. Don't get lost. Don't panic. These are a couple of key rules. Most importantly, have fun.

Website : www.goarticles.com
NEXT ->>...

Sunday, December 14, 2008

Stick Clip Tricks for Sport Climbers

Stick Clip Tricks for Sport Climbers. "Damn, but this wall is steep steep steep," I mutter to myself. I'm mid-lower from a popular sport route and, increasingly, I'm experiencing technical difficulties cleaning the draws. I'm tethered to the rope with a quickdraw, but I'm pumped from the route and the lower I get, the harder it is to pull myself into the wall, unweight the rope and pluck the draws free. Soon though, after much work, the last draw left standing is the first on the route. Stick clipped by most people who climb this line, this particular bolt was placed high specifically to minimize the number of bolts on the route. The FA intended for people to use the clip. And indeed, without a stick clip, if one blows the lower moves, the result will be messy as he or she crashes into a either a chunk of talus or a dead tree trunk, then tumbles another 10 meters to the base of a lower tier cliff. The unlucky belayer will follow unceremoniously to land in a clump atop the climber. Trez Wiley Coyote. So, the stick clip provided me an easy and safe solution, right up until now. I don't want to unclip the first bolt and swing out, because there are other trees waiting hungrily. And I sure ain't gonna boulder back up to clean it, for the reasons mentioned above.

What's a poor, technically inept sport climber to do? Bring out the stick clip again, of course. Many climbers use a clip to place the first draw, but many more are unaware that the standard, home-made aligator-clamp stick clip also makes a fine tool for removing draws and for clipping the rope into already-hung draws. Here's how. First, you need a standard, home-made clip. Most people make them with an extending painters' pole, and aligator clamp and a couple of hose clamps. If you don't know how to do that, try a search.

2521-large_image25201

In the above shot, my home-made stick clip is being used for standard light duty -- hanging a first draw. Note that the the clamp is holding both the spine and the gate of the biner. With a firm enough clamp, even wire gates are no problem. All one has to do is place the draw in the clamp, place the rope in the draw and then reach up and clip. Once the nose of the biner clears the bolt hanger, just yank the stick down. The clamp will release the draw and the gate will shut. If, for some reason, you pull out too early, just slap the spine of the biner with the stick. It'll go right in.

(Insert sex joke here.)

You: But j_ung, everybody knows that trick. What's the point of this post, loser?

Me: Shut up, fool!

CLIPPING THE ROPE INTO A PRE-HUNG DRAW

That's the easy part. Here's where we get a little (for sport climbers, anyway) technical. Let's say you're out swapping leads with your partner and the dehydrated idiot accidentally pulls the rope completely down without leaving you the first clip. No problemo, but it'll take a little rigging. You need another biner. I used a BD Neutrino, but I gotta tell you, bigger biners work better. Trust me on this and save yourself some trouble. Slide the biner up one of the legs of the clamp...

2507-large_image25202 ...bring it all the way up and over the top and then clamp its nose, like so:2508-large_image25203

Notice that the clamp itself and the basket of the biner form a small loop. That's what you need. In fact, the above configuration is the basis for both of the tricks I'm about to show you. From now on, I'm going to call it The Glory Hole. Cram a small bight of rope through The Glory Hole and cinch the biner tightly into the clamp so it holds the bight firmly. The bight should be just big enough to admit a hanging quickdraw, like so:2544-large_image25204

2536-large_image252051

Now, raise the clip to the draw so that the rope is on the gate-side of the draw's bottom biner.

2526-large_image25206

Give the rope a little pull. That's it. Slow and steady.

2549-large_image25207

Voila! You got it!

REMOVING QUICKDRAWS

Warning: This is not easy. It takes practice. Seriously. In my opening monologue I illustrated the problem that arises when it's difficult or even dangerous to clean the bottom draw while lowering. Bust a stick move again! Sport climbers beware: things are about to get very technical... First, build yourself The Glory Hole. Cram another bight of rope through The Glory Hole, just like when you clipped the draw last time. This time, however, bring the loop all the way up to the draw's top biner, again so that the bight of rope is on the biner's gate side.

2515-large_image25208

Give the bight a slow, steady pull to open the biner's gate...

That's it. Now, here's where the practice comes in. The next step is very tricky. The rope is going to want to slide up the gate and into the biner. The only way to keep it from doing that is to pull the rope down tightly to hold the gate open firmly. But also... hold the clip up. That's the tricky part. Practice practice practice... Once you've learned the correct tension between pulling the rope and down and pushing the stick clip up, it's an easy matter to swing the stick sideways a bit and gently lift the biner out of the bolt hanger, like so...

2543-large_image252010

Again, don't expect to get this right on the first try. The good news is that if it doesn't work, you gan just pull the rope and clip down and start again. I think that, as you practice, you'll notice a few things. Keylock biners are easier to unclip than standard hook-and-pin biners. Some shapes work better than others for making The Glory Hole. Blah blah blah... There, now all you technically inept (just kidding!) sport climbers have a gear trick to call your very own.
NEXT ->>...